
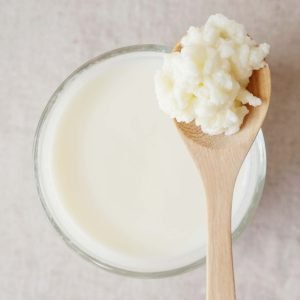
Milk kefir (pronounced keh-FEER, or KEE-fur, I’ve even heard it as KEFF-er) is made with the help of a colony of bacteria and yeasts (aka a SCOBY) which is organized in clumps or “grains” that resemble cauliflower florets. These helpful microorganisms work fast, consuming the sugars in milk and creating lactic acid, digestive enzymes and many other nutrients, and also lending themselves to create natural probiotics.
The thick texture of kefir is due to the formation of kefiran, a viscous polysaccharide that is created by some of the slime-forming lactic acid bacteria during fermentation. Kefiran also comprises the visible clumps on which the bacteria and yeasts live.
Choosing the Right Dairy
Any type of mammal milk (cow, goat, camel, sheep, even horse!) lends itself well to making kefir. Try to use whole milk (usually 3.5% milkfat), as it makes for a better finished product, and contains the optimal ratio of fat to sugars to keep the culture happy and performing well.
The less that milk is processed, the better it is for kefir (and for us!) Using fresh-from-the-animal raw milk is ideal. If that isn’t feasible (which is most of us who don’t have our own goats or cows) Raw, whole grass-fed milk is best because the delicate proteins and fats in the milk, as well as its natural microbiome are intact. Raw, unpasteurized milk (specifically for human consumption) is not available everywhere, and in states and countries where it is legal to sell, it can be rather expensive. That said, it makes a delicious kefir product. I opt for gently pasteurized, unhomogenized whole grass-fed milk (also called “cream top” because the cream rises to the top) whole grass-fed organic cow milk.
Not to go too far on a tangent, but the arguments about the safety of raw milk, alleged illnesses from it, etc. need to be re-examined. While it is true that consuming raw milk that comes from a farm which is set up for pasteurization is hazardous, it is precisely because the milk is destined to be cooked, that the standards of cleanliness pre-pasteurization are tolerated. Contrast that with fresh milk for human consumption, which is an entirely new category of milk. It is being pioneered by the Raw Milk Institute. They are leading the charge to train (or re-train) dairy farmers to implement higher standards for handling raw milk that is destined to be consumed raw. This new standard includes items such as meticulous cleanliness in the milking area, frequent pathogen testing, having on-farm testing equipment, and more. If you’re looking for good quality raw milk, Raw Milk Institute has a directory of North American dairies which they have certified to produce raw milk for human consumption.
Avoid using ultra-high temperature pasteurized dairy of any kind (which may also be labeled as “ultra-pasteurized” or “UHT”). Milk is brought to superheated temperatures (well above the boiling point of water) and pressures, for less than a minute, to destroy potential pathogens. Unfortunately, this ends up being a Pyrrhic victory, since by doing so, a good amount of the proteins and fat molecules are damaged, denatured, or destroyed during this process. The kefir bacteria and yeasts do not perform as well with UHT milk, with its irrevocably damaged proteins and fat molecules. Unfortunately, most of the national organic (even grass-fed) milk brands ultra-pasteurize their dairy products. Opt for a local or regional dairy brand. On the west coast of the united States, Strauss Family Creamery and Clover Sonoma are two brands that make high quality, lower-temperature pasteurized milk products.
Kefir grains also work well in higher fat milk products like half-and-half or heavy cream, and make delicious sour cream. Just be sure to store them back in whole milk once in a while (they need lactose, a sugar which is less abundant in higher milkfat products).
Set and Setting for Kefir
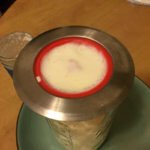
Similar to kombucha, kefir fermentation actually works best in wide containers. Kefir grains tend to float in milk, so a vessel with a wide surface area is ideal for optimal fermentation. I have recently taken to using a glass casserole dish with a lid. This may be a bit extreme. You will certainly have good results using a mason jar, but too. Try to use as wide a vessel as you can. You can also gently stir the milk a few times throughout the process in order to ensure even fermentation.
The recommended amount of grains to use varies widely depending on who’s making it. Plus, with an uneven texture, they’re not very easy to consistently measure. In my experimentation, I find that one teaspoon (5 ml) of kefir grains on average weighs 5.5g. I prefer a 2.5% weight-to-weight ratio of grains to milk. That equates to about 4 teaspoons (22 g) per quart/liter of milk.
Kefir can be fermented in either open or closed-lid containers. In my experiments, I found that fermenting in a wide vessel with a closed lid yields a thicker texture (which I prefer with my kefir). Open containers (with a breathable cover, to keep insects out) will work fine, too, and may produce a less pronounced sourness, and may be less viscous, or take a few hours longer to become thick. Each method will produce slightly different flavors and textures.
Kefir Grains (aka SCOBY) will typically grow in volume (“multiply”) during fermentation. In my practice, I noticed a 5 to 25% growth with each fermentation.
After fermentation is complete, strain out the grains (I use a silicone sink strainer) into another container, and then transfer the grains into a jar of fresh milk. Ideally, you are feeding the grains by making batches every week or so. However, I have had months go by between batches. The grains, when neglected this long, aren’t happy, and may take a lot longer to ferment milk when restarted. If this scenario happens to you, I suggest making a few small batches, one after the other, to get the grains back into optimal shape. So if you want to make a half gallon, for example, start by making one pint at a time. The initial batch or two may taste out of balance, either not becoming very thick, or becoming very sour before thickening, etc. It will be perfectly fine to drink, but you can also feed it to your chickens or compost if desired.
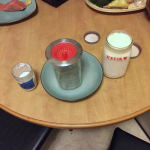
In the summer, when it is too hot inside to make kefir properly (it was 84°F / 29°C in my kitchen), I used a curing/incubation chamber to keep it cool, and this resulted in a perfectly thick texture and great, balanced flavor!
Kefir
Equipment
- silicone sink strainer
- funnel
Ingredients
- 1 liter (quart) whole milk, plus 1 cup (250 ml) for feeding culture unpasteurized (raw), unhomogenized, or vat pasteurized (not UHT pasteurized)
- 22 g (20 ml), 4 tsp. of dairy kefir grains (2.5% w/w)
Instructions
Ferment
- Reserve 1 cup (250ml) fresh milk in a pint or quart sized jar with a lid and store in refrigerator (will be used later).
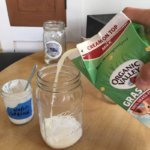
- Add remaining fresh milk to a wide-mouth quart/liter jar.
- Add kefir grains to milk. Stir contents gently.
- Cover container tightly for a more sour flavor, or cover with a breathable cloth if you want a milder flavor.
- Leave container in a cool, dark spot for 24 hours. Stir gently once or twice if you think of it.
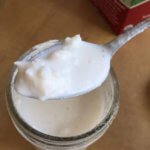
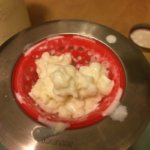
- After 24 hours, taste. Milk should have thickened up and may even have broken into solid curds and liquid whey. If it is sour and thick enough for your taste, it is ready to strain. If not, replace lid(s) and check kefir again in a few hours.
Strain and Store Kefir
- Secure the lid tightly (if possible) and shake or stir the kefir vigorously until it is smooth and evenly textured. This is usually only necessary if the curds and whey have separated.
- If using unhomogenized (cream top or raw) milk, carefully skim the cream from the top, ensuring there are no large kefir grains stuck in it. Add to your kefir storage (a clean glass) container.
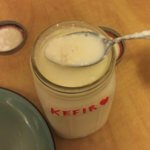
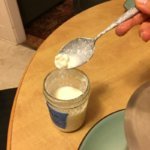
- With a wire mesh strainer or a silicone sink strainer, strain the kefir into a clean glass container for storage. The grains are rubbery, yellowish and translucent, and won't go through the strainer.
- Add the strained grains to the fresh milk you reserved earlier to keep them happy and healthy.
- Store finished kefir and the grains jar in the refrigerator. Consume within 1-2 weeks.
Making Kefir


Looking for high quality Milk Kefir Grains?
Cultures for Health sells high quality, milk kefir grains. [Note: We are an affiliate of CFH and we earn a small commission for each product sold through this site.]
How to Enjoy Kefir
Drink it straight (it is slightly thicker than milk) or use it to make smoothies. I like to make a morning parfait using some fresh fruit and some nuts or seeds.
How else can you enjoy it? The possibilities are endless! Use it as a substitute for un-cultured milk in almost any recipe, as a starter for homemade granola; as a base for cultured ice cream, or even in eggnog!
Leave us a comment and let us know how YOU like your kefir!
Kefir & Water Kefir
Kefir and water kefir are not the same culture. Water kefir (aka tibicos) evolved from a cactus native to Mexico. It got its confusing nickname because its SCOBY also forms in small clumps resembling milk kefir. The cultures are different and are not interchangeable. You won’t have much luck using water kefir grains in milk, nor vice versa.
Author and founder of Fermenters Club. I’ve been fermenting food for 16 years.
In 2024, I published my first book, Fearless Fermenting.
When not stuffing things into jars, I enjoy permaculture gardening, cooking, yoga, writing, and studying cosmology and esoteric traditions.

I have found when using cream that if you put in one tablespoon of evaporated milk makes the fermentation stronger and the allows the grains to grow stronger and bigger. Im very interested in learning all I can and to experiment as I go.
Thanks for sharing that tip, Donnella! Makes sense since evaporated milk is usually more concentrated in sugars, which the microbes love.
Pingback: Soaked "Sourdough" Granola | Fermenters Club
Pingback: Cauliflower Mash with Kefir | Fermenters Club
Pingback: Water Kefir | Fermenters Club
Pingback: Kefir Eggnog | Fermenters Club
Pingback: Kefir Ice Cream | Fermenters Club
Pingback: Kefir Cream-Sour Cream | Fermenters Club