Kimchi originates from Korea, and roughly means “salted vegetable.” There are hundreds of ways to make it, offering an unlimited canvas on which to paint different flavors. Use any crunchy fresh vegetable. Tweak the flavors in the paste by varying the amount of ginger, garlic, fish sauce, and red peppers (or by adding any other ingredients) to customize the taste exactly to your liking.
Soak, Rinse, Slather, Pack
This technique where we cut the cabbage into bite size pieces prior to salting and fermentation is considered mak which translates to “carelessly”. (More formal/traditional method of fermenting kimchi is to leave the cabbage whole, or in quarters, and then cut it right before serving it.)
Soak the cabbage and radish (if using) in a 5% (salt to water ratio by weight) brine, from 30 minutes to 4 hours. Drain (but do not rinse) the cabbage and other veggie pieces.
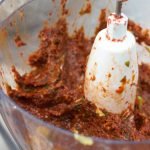
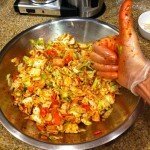
Next, make a paste using soy and fish sauce, aromatics like scallions, ginger, and garlic, and red pepper powder. Slather up the soaked veggies in the paste in order to prepare the mixture for its short fermentation journey to kimchi.
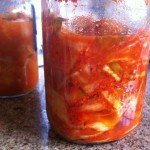
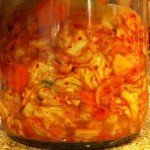
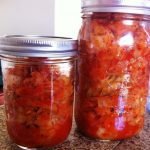
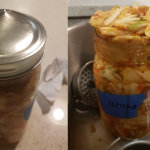
Finally, pack well-mixed contents into a jar or crock. Weigh it down and cover with a cloth, or use a small-batch fermentation device to minimize air and let gas escape.
Fermentation Time
The length of kimchi fermentation can vary widely according to the season and your location. Some prefer to do a short (2-3 days) ferment at room temperature, and then transfer to a refrigerator for further flavor development. In the southern California coastal climate (USDA hardiness zone 10a) where I live, I find that 9 days fermentation time is perfect for this recipe most times of the year. Once moved to the refrigerator, fermentation activity is dramatically reduced, but the flavor slowly continues to develop and improve as it sits several weeks in the fridge.
In fact, many Korean households have special kimchi refrigerators for that purpose. These special high-tech fridges maintain slightly warmer temps than typical refrigerators (55F versus 40F), use “direct cooling” and can be set to “fermentation mode” to closely simulate the traditional earth temperature conditions when burying an onggi (crock) halfway in the ground. Hmm, we wonder if you could repurpose a wine refrigerator, with similar temp range and technology, as a dedicated kimchi refrigerator?
Experiment with different times and keep track of what works best in your climate.
Red Pepper Powder (Gochugaru)
Most traditional kimchi recipes are spicy and use red pepper powder, known as kochugaru or gochugaru (gochu means pepper in Korean). It’s available at most Asian markets. Kimchi can also be made with fresh peppers, too. And any style of kimchi made without chile peppers is considered white kimchi.
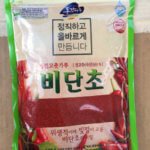
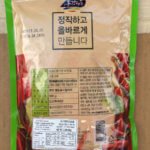
When buying gochugaru, look for a coarsely or medium sized grind. And make sure that red pepper is the ONLY ingredient. Some brands include salt or even preservatives. We want to control our own salt level, so only buy the pure stuff!
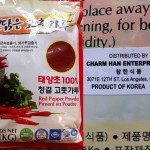
Most brands are made from peppers grown China. Prices for most Chinese grown pepper powders range from $5 to $8 per lb (450g). Korean pepper powder is less intensely red than the stuff from China.
Labels can be tricky! Even the brands which are “Product of Korea” may only have been packed there. It is difficult to know the murky origin of the actual peppers inside the package.
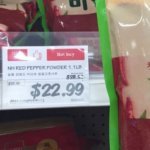
We finally found truly Korean-grown gochugaru. It cost about $25-$30/lb./500g. This brand is seasonally available (we found this in late September) at HMart, an Asian grocery chain in the U.S. You can also order it online here. More info about this product (in Korean) here.
$25-$30/lb.
really really grown in Korea!
Korean-grown pepper powder
That’s a spicy meat-a-ball!
HMart, San Diego, CA
Grow your own Korean Chiles
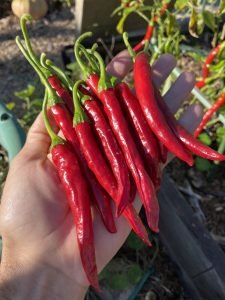
If you have a green thumb, you can also grow your own hot peppers in the summer and then dehydrate them to make your own gochugaru. That way, you can use any kinds of pepper variety you like. When shopping for seeds, the variety is often simply called “Korean hot pepper”.
SIDEBAR: How Hot are Korean Chiles?
Korean peppers don’t appear on common Scoville scales (the scale that’s used to rate hot peppers relative to each other). Based on our research, it seems like they may be around 10,000 Scoville units, somewhere hotter than a jalapeno but not as hot as a cayenne or habanero. Sources [1], [2] and [3].
Korean peppers grown in my garden!
Kimchi paste consistency
Eat fermented foods often and in condiment-sized portions
1lb.(500 g) Korean or daikon radishabout one medium Korean radish or one 12 inch/50 cm length daikon
6Tbsp.(120 grams/90 ml) fine sea salt or kosher salt
Kimchi Paste
5scallions
4-5cloves(about 20g) garlic
2inches(6cm) piece organic ginger root, about 15g
½cup(125 ml) dried red pepper powder
1Tbsp.(15 ml) soy sauce or tamari (gluten-free soy sauce)
1Tbsp.OPTIONAL (15 ml) fish sauce with no preservativesomit if vegan
Instructions
Soak Vegetables
Stir salt into water until it dissolves.
Remove any “floppy” outer leaves from the cabbage (Compost or reserve for another use.) Chop the cabbage into 1-inch chunks/strips. Discard or compost the core.
Peel and cut stems off radish. Cut into 1/4"/ 6mm thick and about 1-inch (2.5 cm) wide & long slices using a mandoline, V-slicer, or knife. Cut the slices into halves or quarters as needed.
Add cabbage and radish pieces to the brine in a large container or mixing bowl. Cover with a weight (e.g. a glass wine bottle, plate, sterilized rock) to submerge them under the brine.
Brine for 2 to 6 hours to soften and season the vegetables.
Drain the veggies through a colander, reserving one cup (250 ml) of the brine. Do not rinse the veggies.
Prepare Spice Paste
With a Food Processor
Chop the scallions (using both the green and white part) into 1/2 inch (1 cm) slices. Add to the mixing bowl of a food processor.
Peel and roughly chop the garlic and peel and slice the ginger. Add to mixing bowl.
Add pepper powder, soy sauce and fish sauce (if using) to mixing bowl.
Run food processor until ingredients are all incorporated and a thick paste forms. It will be finished when it "rolls" over in a donut shape in the bowl of the food processor.
You can adjust by adding more tamari/soy sauce if it needs to be wetter, or more pepper powder if it needs to thicken up. Alternately, you can use the reserved brine to adjust the texture of the paste.
Paste By hand
Chop the scallions (use green and white part) into 1/8"/ 3mm slices.
Add to a small mixing bowl.
Peel and grate the ginger, and mince the garlic into a fine dice, and add to bowl.
Add pepper powder, soy sauce and fish sauce to mixing bowl. Vegan variation: omit fish sauce.
Stir and mash contents (or pulse with food processor) together until a paste forms.
You can adjust by adding more tamari sauce if it needs to be wetter, or more pepper powder if it needs to thicken up.
Pack Jar or Crock
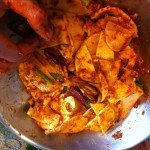
Wear protective food-grade gloves to protect yourself from the pepper paste and keep your hands from smelling like garlic and fish sauce.
You can mix the veggies and paste together in a separate large mixing bowl or directly in the fermenting container. Mix the paste and veggies thoroughly with your hands, coating each morsel.
Ferment
Pack mixture tightly into a glass or ceramic vessel. Ensure that the top surface is even and flat.
If using a small batch fermentation lid, add weight(s) to the jar, then apply fermentation lid.
If using a crock or wide-mouth vessel, add a plastic lid or plate on top of the contents, and a weight to press down and keep contents under the brine. It may not seem very "briny" when you first pack it, but brine will continue to form once the veggies are pressed down. Secure with a cloth and rubber band to keep flies out.
Store in an out-of-the-way spot in your kitchen or house for 5 days. Note: Your house will smell like kimchi.
After 5 days, start to check on the kimchi daily by tasting it. If it still needs more time to develop, let it ferment another day or two. (Fermentation varies by location and season. Nine days is perfect in the drylands Mediterranean coastal climate where I live.)
Once you like the taste and texture, transfer it into mason jars (or remove fermentation lid and replace with the standard mason jar lid) and store in fridge (or swap with your local club members!)
Kimchi will keep in the refrigerator for many months. It will never go "bad" unless it dries out and forms mold. If it is too soft to enjoy raw, consider using old kimchi for stews or soups.


Pingback: San Diego County Events for March 29 - 31, 2019
Pingback: Kim-Chee-zy Cheese Dip | Fermenters Club
Pingback: "Why We Ferment" with Kimchi tutorial [Video] | Fermenters Club