A few years ago, I learned how to make tempeh at Sandor Katz‘s fermentation workshop in middle Tennessee. After seeing the process, it seemed like a lot of work, and I admit that I did not want to rush out and try it. But I’m glad I finally took the plunge!
What is tempeh?
Tempeh is an Indonesian bean cake, made by culturing (or more precisely inoculating) a legume, traditionally soybeans, but most any bean will work, with Rhizopus oligosporus fungus spores, then incubating for 24 to 36 hours at tropical temperatures (85°-90°F/29°-32°C). Here’s where I get my tempeh starter. [Disclosure: I am an affiliate of CFH and receive a small commission for sales of their products.] The fungus will propagate itself in and amongst the substrate (the medium on which the fungus grows and feeds– the beans and rice), consuming some of the protein in the beans, and taking the form of the container in which the tempeh is incubating.
What you do with it is up to you! Many people treat it like tofu– try marinating it in some soy sauce, rice vinegar, oil and chili paste for a half-hour before frying in some coconut oil. If you have an interesting recipe, please share it in the comments section!
Which legumes are best to use for making tempeh?
Soybeans are the most common legume used to make tempeh. However, according to William Shurtleff in his wonderful The Book of Tempeh, beans with a high protein and low starch content (chickpeas/garbanzos, pink beans, pinto beans, red kidney beans, California blackeye-pea, or black beans) work best. Beans with high carbohydrates (mung, azuki, lentils), says Shurtleff, become mushy after cooking, and in my experience, they hold onto moisture. Having the right moisture level to make tempeh is critical; “Wetter” beans are not as ideal. The Rhizopus mycelium needs nooks and crannies in the substrate which to grow. If you’ve got more of a “muddy” field (i.e. with a softer, wet cooked bean), then the mold hyphae can’t get a good foothold!
Other Interesting Facts
Making tempeh is the same process by which mushrooms are cultivated. But most cultivated mushroom species we are familiar with (crimini, oyster, enoki) grow at cooler temperatures. And with mushrooms, we eat the fruiting portion of the fungus (the “above-ground” part) rather than the mycelium (the body, which with mushrooms is usually underground). With tempeh, we eat the mycelium and the substrate and do not wait for it to fruit. In fact, it doesn’t “fruit” like other mushrooms; rather it sporulates (creates spores) on its surface, giving it a black, blue or green splotchy look.
Note that tempeh is not a “lacto-fermented” food like sauerkraut or yogurt, meaning that there are no lactic acid bacteria or probiotic properties after you have prepared it. The “fermentation” refers to the process of propagating the culture (fungus) in the incubator. But there are many other benefits to eating tempeh, including beneficial enzymes, and the fact that the beans are more easily digestible (and nutrient-accessible) compared to uncultured, cooked beans.
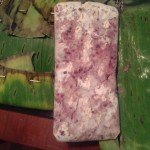
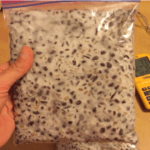
Option #1: Chickpeas + Oven + zip-top bags
FIRST TIME: I followed the basic recipe from Sandor’s Wild Fermentation book, but also paid attention to the instructions from the starter culture I got from Cultures for Health, and took a few tips from Sandor’s new book, The Art of Fermentation. Note that tempeh is a cultured ferment, meaning that you need to add a specific culture to create it. (It will not spontaneously form the way that, say, sauerkraut would.)
INCUBATOR: If you live in an area where the room temperature is between 85° and 90°F, then you don’t need an incubator. Room temperature around these parts is about 70°F and relative humidity 45%, so I needed to simulate the tropics. I put a $12 clamp lamp with a 40W incandescent bulb to generate heat at the bottom of my oven. If you have a pilot light or a bright oven light, often that will generate enough heat. I added a shallow pan of water to increase humidity.

You can also build a custom fermentation curing chamber!
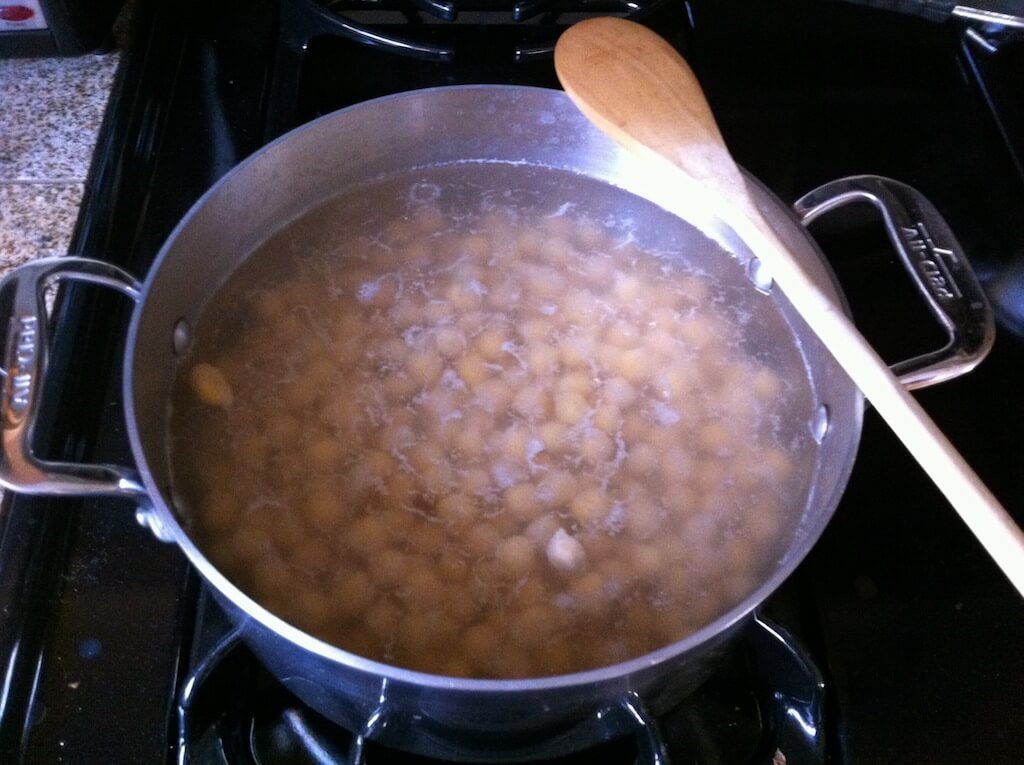
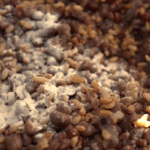
I used chickpeas (aka garbanzo beans), which I had soaked for 24 hours in whey and water. I also mixed in some “dry-cooked” brown rice (another Sando-vation) into the substrate to absorb some of the residual moisture from the cooked beans.
The recipes call for hulling the beans (removing the skins) so that the mold can more easily get to the proteins. Being lazy, I didn’t bother with this step, although I did mash the beans and removed many of the hulls manually.
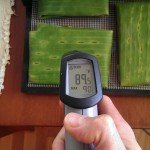
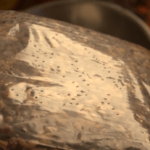
I kept the temperature between 87° and 91°F/30° and 32°C degrees throughout the incubation. It actually took closer to 48 hours for the fungus to fully bloom. Once dark grey/black spots form (indicating the fruiting phase), I knew it was ready and I removed it from the “heat.”

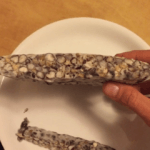
Finally, I removed it from the bags and let it cool to room temperature before refrigerating. I sliced it all and fried some right up! If you are not going to eat all of it within a few days, freeze the remainder. Slicing it before freezing lets you make a little at a time.
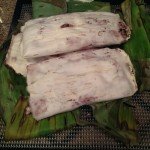
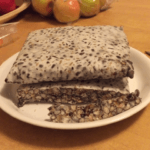
Option #2: Dehydrator + banana leaves
DEHYDRATOR: This device is a good tempeh-maker! Even the most budget versions have a temperature control. Set it sucker to 95°F and fuggedahboudit! It’s brilliant at keeping air circulation and temperature constant throughout the process, making it a perfect tool for the job.

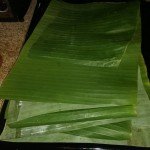
Banana leaves were originally used, and are common tools in southeast Asian cooking. For our second time, we went old-school after finding some beautiful banana leaves locally.
Second pass, we tried aduzki beans and barley as our substrate. It was a bit wetter than we wanted (barley is highly absorbent), so it took 55 hours in the dehydrator to fully develop. We suspect that if we started with a drier mixture, we can get that time down by at least 12 hours.
We learned not to mash the beans too much, as that creates a denser and wetter mixture. We want the substrate to be light enough to allow the mycelium to form. That requires cracks, crevices and crannies, so keep the beans as whole as possible.

Option #3: Curing/Incubation Chamber
I built a multi-purpose curing chamber, and I have used it to successfully make tempeh. Read all about making one at home.
Tempeh
Ingredients
- 1 1/2 cups (300 grams) dry beans like soybean, chickpea or adzuki
- 2 Tablespoons (30ml) liquid whey, pickle brine or lemon juice
- 1/2 cup 90 grams dry brown rice or barley
- 1 packet Tempeh starter
- Filtered water
Instructions
Soak and Pre-Ferment Beans
- Check beans and remove any rocks.
- In a mixing bowl or large (half-gallon or gallon) jar, add beans, whey or lemon juice, and enough water to cover beans.
- Soak overnight or up to 24 hours.
- If using barley, soak barley in filtered water overnight or up to 24 hours.
Prepare Mixture
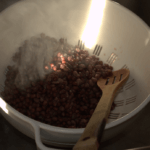
- Drain and rinse soaked beans.
- Add beans to boiling water, and cook for only half the time (varies by bean type) you would if you were cooking them to eat directly. You want them to be al dente (not quite fully cooked).
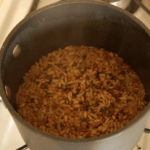
- If using rice (not barley), follow normal cooking instructions, except use equal parts rice to water to make the rice 'dry'. (This is important to help absorb moisture from beans.)
- If making barley (not rice), drain barley from soaking water then add bring 2 cups water to a boil in a saucepan. Add barley and cook until it relatively dry (but not so dry that it sticks to the bottom of the pot and burns. Stir it frequently to avoid burning it.
- Drain cooked beans, let cool enough to handle them, then rub beans together to de-hull them. Pat dry with a dish towel.
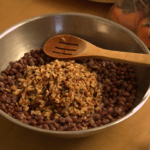
- Transfer beans to a large mixing bowl. Mash lightly. Add cooked rice or barley if using.
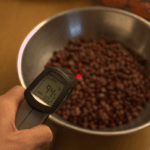
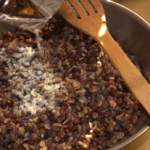
- Let mixture come down to body temperature (100°F/38°C), then add tempeh starter and mix thoroughly.
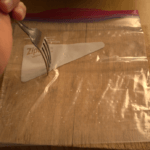
- Punch holes every 1/2 to 3/4 inch (1 to 2cm) into both sides of either two 1-quart/liter or one 1‐gallon/4 liter zip‐top bag (you are creating air holes for the tempeh to breathe.)
- Add mixture to bag(s).
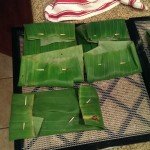
- If using banana leaves, add a square or rectangular portion of the mixture about 1 inch thick (not thicker than 1 1/4") to the center of the leaf. Fold the sides in (like you are wrapping a gift). Fold the ends in and use toothpicks to secure the ends of the "package".
- If using banana leaves, use a sharp knife to cut small (1/4 inch long) slits all on both sides and along the sides of each package.
Incubate Mixture
- Create an environment where the temperature is consistently between 85° and 91°F (29°‐32°C), either an oven or a dehydrator, or a dedicated incubation chamber. Use a thermometer with an alarm to ensure you stay in the safe zone.
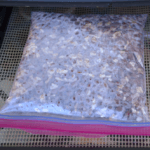
- Place bag(s) in incubator.
- Check after 24 hours (unfold banana leaf package to inspect). Tempeh is ready when entire contents are white, indicating that the mycelium has enveloped the rice/bean mixture, and some dark grey/black spots start to form near air holes.
- If the mycelium has not fully developed, let it go another 12 hours, then check again.
- Remove from incubator and use immediately, or refrigerate it.
- If storing in the refrigerator, consume within 4 to 5 days, or slice and then freeze any portion you won’t eat before then. Lasts indefinitely in freezer.
Batch #1 Gallery


Batch #2 Gallery


Batch #3 Gallery


Author and founder of Fermenters Club. I’ve been fermenting food for 16 years.
In 2024, I published my first book, Fearless Fermenting.
When not stuffing things into jars, I enjoy permaculture gardening, cooking, yoga, writing, and studying cosmology and esoteric traditions.

I am looking for someone who I experienced with tempeh making who could possibly tell me if it would be ok to blend the beans for a smoother texture. I ate tempeh at a restaurant once that felt a bit spongy, not so dense and loved it. Wondering if I would achieve this by smooth blending the beans before I put the cultures and incubate.
Great question, Irene. The spongy part that forms during tempeh is the mycelium (the “body” of the fungus) and it does require both space in between the beans and oxygen to form properly. If you started out with a blended mixture or slurry, I believe it would not be able to form properly. I suppose you could “crush” the beans to reduce their size a little bit to adjust the finished texture, but not so much that the fungal threads couldn’t penetrate the space between while at the same time feeding on the beans.
In fact, I recall some attempts to make tempeh with beans that had higher levels of moisture (like black beans) did not work because there was too much water and the texture wasn’t quite right. I imagine that could happen with a blended mixture. But again, maybe try a few pulses in a food processor, so the texture isn’t too dense, and see how it goes!
Looks great! I’m curious what are your favorite beans flavor wise? My partner and I don’t really enjoy the soybean tempeh. Also, instead of using a starter, can you use already made tempeh?
Hi, some tempeh making recipes calls for vinegar to be added after the beans are boiled. may I know what is the difference if they whey/lemon juice/vinegar is added during soaking or after they are boiled?
Hello,
I have not heard of that technique, but I would guess that adding acid is important after cooking in order to lower the pH and to ensure other microbes do not join the party before the spores are mixed in.