It’s quite simple to make your own sour cream, using only good quality heavy cream, and a little store-bought sour cream as your “starter”.
By making sour cream yourself, you can achieve higher quality. Here in southern California, there are many more choices of heavy cream in the dairy case than there are sour cream choices. There’s raw, local-ish (from northern California), pastured & grass-fed, glass bottled, and low-temp pasteurized (not ultra-pasteurized), to name a few. Or if you’re fortunate enough to have your own source of cream (moo!), even better!
For the starter brand, you can find store brands that are inexpensive and of decent quality (at least organic). While organic is no guarantee of the welfare of the animal which was milked (it only refers to its feed), it’s one step above conventional.
I use pasteurized heavy cream (cow) for my coffee (don’t judge it ’til you try it!) However, I don’t always consume it fast enough. When it gets old (after about 10 days), pasteurized heavy cream (even the good quality stuff) tends to “break” when added to hot coffee. It is rather disgusting when this happens (not to mention, it ruins a perfectly good cup of coffee!) When this happens, it’s actually starting to sour (putrefy) with errant bacteria in the environment– not necessarily the microbes we want to cultivate. This is a risk of using pasteurized dairy, and why it “goes bad” in that way. Note that raw (unpasteurized) cream doesn’t suffer from this problem, because it has its own “good” microbes that will, in fact, sour properly with NO additions.
I use this “older” cream to make sour cream. It’s an alternative to throwing it out, something I am loathe to do with food. I simply take a tablespoon or two of store bought sour cream, and thoroughly mix it in.
You can also get really consistent results (perhaps even better than store-bought sour cream) using a sour cream starter, which typically comes in small packets dehydrated. I have not tried this yet as I have gotten good results with sour cream as starter.
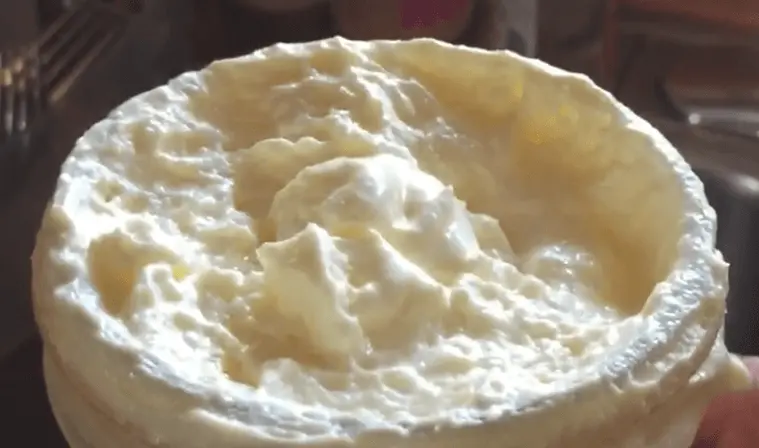
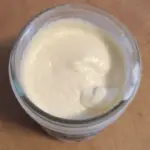
Typically it takes a day at room temperature, maybe longer if it’s cooler. Ideal fermentation temperature is about 75°F/24°C. The texture will thicken, but you might notice the liquid (whey) still pools at the bottom. this is normal with homemade sour cream; simply stir it a bit right before you use it each time.
This batch took three days to sour (late winter/early spring, the room temp was on the cool side at about 71°F), but it eventually got there.
Sour Cream
Ingredients
- 8-10 oz. (250ml) good quality heavy whipping cream (avoid UHT or Ultra-pasteurized)
- 2 Tablespoons (30ml) high quality sour cream
Instructions
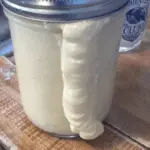
- Add cream to a pint sized (or larger) jar.
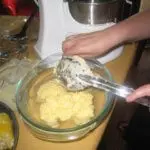
- Spoon sour cream and mix thoroughly.
- Secure jar lid and shake gently for 1-2 minutes until cream thickens. Stop before it "breaks", otherwise you'll end up making butter and buttermilk!
- Burp lid, then let it ferment at room temperature (ideally 75°F/24°C) about 24 hours.
- Stir contents and taste. If it needs more souring, let it ferment another day or two.
- Store in refrigerator with lid on.
Once you’ve started it, it should be able to propagate a few times (but I haven’t gotten this far yet in my own experience). According to my research, there is a limit to how many times before you’d need to re-inoculate with store bought.
Have you made your own sour cream? Please share your experience in the comments below!
Author and founder of Fermenters Club. I’ve been fermenting food for 16 years.
In 2024, I published my first book, Fearless Fermenting.
When not stuffing things into jars, I enjoy permaculture gardening, cooking, yoga, writing, and studying cosmology and esoteric traditions.

Why do you use a closed lid and not a cloth? I’ve made Creme Fraiche and now experimenting with sour cream starter. I don’t recall seeing on recipes to use a lid, but I may be overlooking that. My cream has been coming out pretty runny at 24 hours. Would like it to be thicker so maybe I’ll try covering it. I’m also heating the cream and then cooling before adding starter. Thx!
My sour cream, which I’ve tried twice now, comes out with long, disgusting, mucous strings. It smells and tastes fine. Do you know why this is happening and how I might prevent it?
I’ve not seen that with dairy, although I have seen the brine get “slimy” with vegetable ferments that are high in sugar (carrots, beets, sweet potatoes). Usually that texture goes away after a few days when making veggies.
That stringy texture reminds me of viili, a specific Finnish yogurt culture.
What are you using to backslop your cream?
Pingback: Kimchi Cheese Dip ("Kim-cheezy") | Fermenters Club