
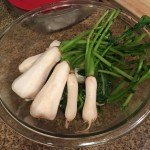
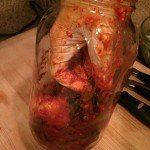
Young radish (yeolmu 열무김치) aka “ponytail” kimchi is a summer delicacy. Use the whole veg, stems and all! Traditionally it is made with fresh green and red chiles. I substituted red pepper powder and used cucumbers rather than green chiles.
A traditional paste is made with rice flour porridge (congee), but most of my recipes don’t actually include it. Feel free to omit it.
Ponytail Radish Kimchi
Prep time
Fermentation time
Yield: 1qt
Ingredients
- 1½ to 2 lbs. young radishes (about 2 small bunches)
- 2 quarts/liters plus ¾ cup filtered water
- 6 Tablespoons (90ml) plus 2 teaspoons more for seasoning. fine sea salt
- 3 scallions (green onions)
- OPTIONAL 1½ Tablespoons rice flour
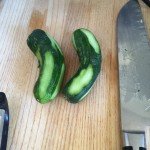
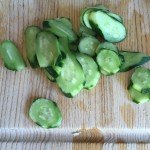
- ¼ lb (60g) cucumbers
- 2 ounces by weight (60g) red pepper powder
- 1½ ounces by weight (40g) ginger
- 2 ounces by weight (60g) garlic, peeled
Instructions
Mix Brine & Soak Veg
- Dissolve 6 tablespoons sea salt into 2 quarts/liters of water.
- Rinse dirt off radishes. Add radishes to brine.
- Weigh down radishes. Let them sit in brine 2-4 hours.
Make Paste
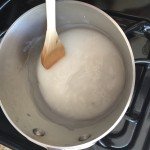
- If using, Add rice flour to ¾ cup of water in a saucepot. Heat on medium. Stir until flour is dissolved and mixture becomes a thick paste (congee), usually takes about 2 minutes. Remove from heat and allow to cool.
- Peel garlic and peel ginger (using a spoon). Chop roughly.
- Add to work bowl of a food processor, along with red pepper powder. Pulse until garlic and ginger have been finely chopped.
- If using, when congee has cooled, add to a bowl. Add garlic-ginger mixture and stir together.
- Peel and slice cucumbers on the bias. Chop scallions into 1" slices. Add both to paste mixture.
Pack and Ferment
- Drain radishes, squeezing greens out.
- Peel the outer skin of the radishes, being careful not to separate them from the greens.
- Coat the radishes heavily with paste, ensuring you get paste in the greens, too. Pack into a glass jar (quart-sized or larger) or crock.
- Add any residual paste to jar/crock.
- Cover with a plastic lid or plate, and weigh down so that the contents stay under the brine.
- If using quart-sized jars, use a small batch fermentation glass or ceramic weights, or find a small glass jar (filled with water) that closely fits inside the diameter of the jar.
- Cover jar(s) with a cloth and rubber band to keep flies out (or secure with fermentation airlock device).
- Ferment for 7-8 days. Transfer to refrigerator. Enjoy within 1-2 months.


Author and founder of Fermenters Club. I’ve been fermenting food for 16 years.
In 2024, I published my first book, Fearless Fermenting.
When not stuffing things into jars, I enjoy permaculture gardening, cooking, yoga, writing, and studying cosmology and esoteric traditions.
